How To Create Database In Postgresql In Ubuntu 18.04
The PostgreSQL Development Team has announced the latest version PostgreSQL 12. PostgreSQL is an open-source object-relational database system. It is one of the leading database servers used for production servers. PostgreSQL allows us to execute stored procedures in various programming languages, like C/C++, Python, Java, Perl, Ruby, and its own PL/pgSQL, which is similar to Oracle's PL/SQL. This tutorial will help you with installing the PostgreSQL database server on your Ubuntu 18.04 LTS, Ubuntu 16.04 LTS, and 14.04 LTS systems.
- Recommended => Install pgAdmin4 on Ubuntu
Step 1 – Enable PostgreSQL Apt Repository
PostgreSQL packages are also available in default Ubuntu repository. So you need to add PostgreSQL apt repository to your system suggested on official PostgreSQL website using following command.
Start with the import of the GPG key for PostgreSQL packages.
sudo apt-get install wget ca-certificates wget --quiet -O - https://www.postgresql.org/media/keys/ACCC4CF8.asc | sudo apt-key add -
Now add the repository to your system.
sudo sh -c 'echo "deb http://apt.postgresql.org/pub/repos/apt/ `lsb_release -cs`-pgdg main" >> /etc/apt/sources.list.d/pgdg.list'
Step 2 – Install PostgreSQL on Ubuntu
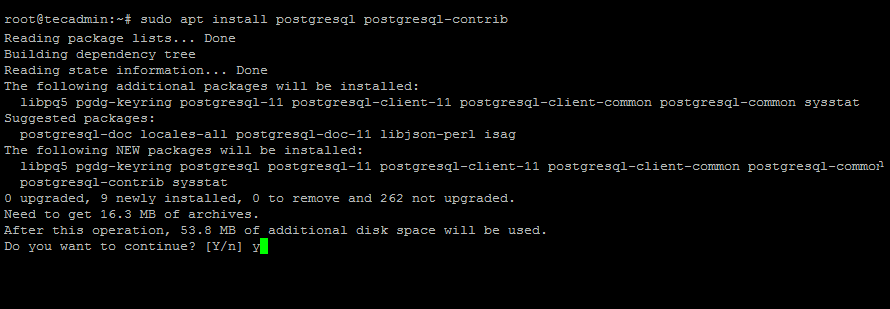
Now as we have added PostgreSQL official repository in our system, First we need to update the repository list. After that install Latest PostgreSQL Server in our Ubuntu system using the following commands.
sudo apt-get update sudo apt-get install postgresql postgresql-contrib
Multiple other dependencies will also be installed. PostgreSQL 12 is the latest available version during the last update of this tutorial.

Step 3 – Create User for PostgreSQL
By default, PostgresQL creates a user 'postgres' with the role 'postgres'. It also creates a system account with the same name 'postgres'. So to connect to Postgres server, log in to your system as user postgres and connect the database.
sudo su - postgres psql
Now configure PostgreSQL to make is accessible by your normal users. Change your_username with your actual user already created on your Ubuntu system.
postgres-# CREATE ROLE your_username WITH LOGIN CREATEDB ENCRYPTED PASSWORD 'your_password'; postgres-# \q
Then switch to the user account and run createdb command followed by the database name. This will create a database on PostgreSQL.
su - your_username createdb my_db
After that connect to the PostgreSQL server. You will be logged in and get database prompt. To list all available databases use these commands.
psql rahul=> \list List of databases Name | Owner | Encoding | Collate | Ctype | Access privileges -----------+----------+----------+---------+---------+----------------------- postgres | postgres | UTF8 | C.UTF-8 | C.UTF-8 | my_db | rahul | UTF8 | C.UTF-8 | C.UTF-8 | template0 | postgres | UTF8 | C.UTF-8 | C.UTF-8 | =c/postgres + | | | | | postgres=CTc/postgres template1 | postgres | UTF8 | C.UTF-8 | C.UTF-8 | =c/postgres + | | | | | postgres=CTc/postgres
To disconnect from PostgreSQL database command prompt just type below command and press enter. It will return you back to the Ubuntu command prompt.
postgres-# \q
Conclusion
Your PostgreSQL installation has been completed successfully. Let's move to install Graphical user interface for PostgreSQL like pgAdmin4 and phpPgAdmin of Ubuntu systems.
How To Create Database In Postgresql In Ubuntu 18.04
Source: https://tecadmin.net/install-postgresql-server-on-ubuntu/
Posted by: leboeuffroir2002.blogspot.com

0 Response to "How To Create Database In Postgresql In Ubuntu 18.04"
Post a Comment